 Campound
The Dictionary
Help guide · Updated June 25, 2026
Open the Dictionary
The Dictionary lives in the More menu — the three-dot icon at the right end of the toolbar.
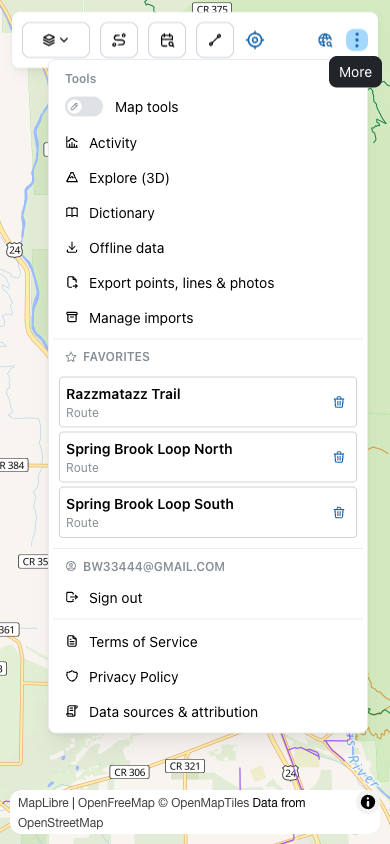
Three dictionaries, one for each geometry
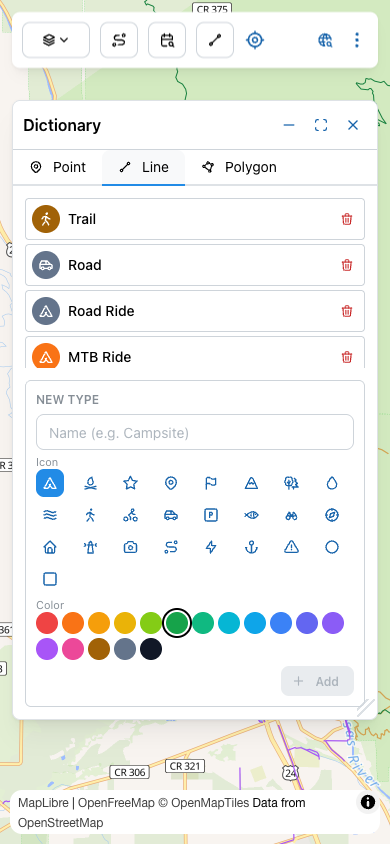
The dialog has three tabs across the top — one per shape you can draw on the map.
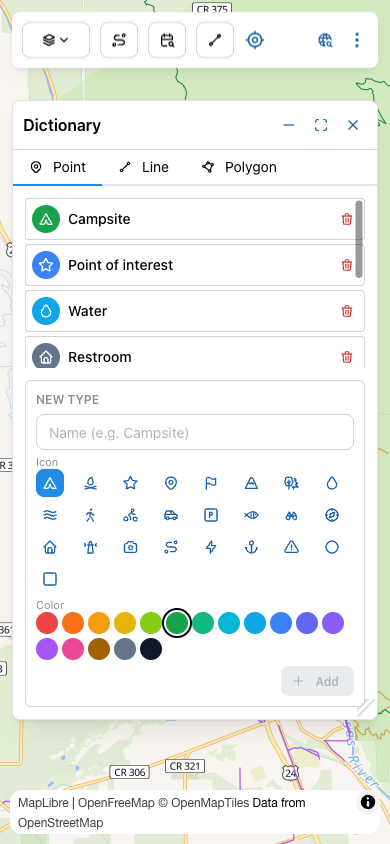
- Point — individual pins. Campsite, Point of interest, Water source, Restroom, anything you want to mark at a single location.
- Line — trails and routes. Trail, Road, Road Ride, MTB Ride, Stream. Use these for anything that has a path: a hiking trail you walked, a forest road you drove, a bike route you rode. When you record a track with GPS or trace one by hand, it's saved as a line of the type you pick here.
- Polygon — bounded areas. A camp area, a no-go zone, a marsh edge. Use these when "the whole region" is what matters.
The anatomy of a type
Tap an existing type in any list to expand its editor. Every type has the same four parts.
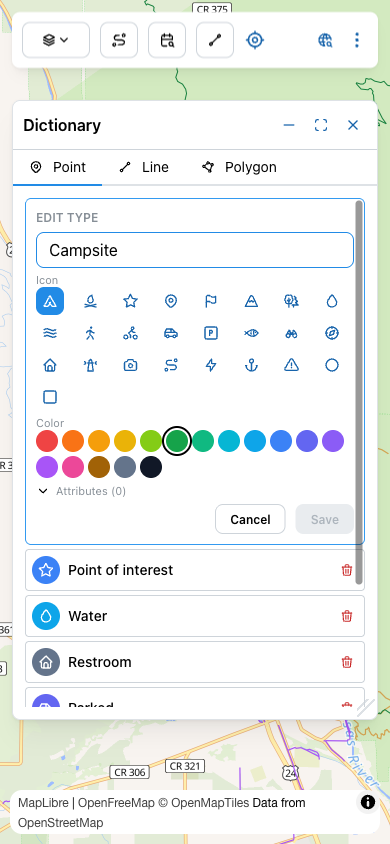
- Name — what you'll call it when you draw one. Keep it short.
- Icon — picked from a fixed grid. Used everywhere: on the map, in the picker when you tap to draw, in feature lists, and in the watch app.
- Color — picked from the swatch row. Drives the icon tint and (for lines/polygons) the stroke and fill.
- Attributes — your custom fields. Optional. Skip them and features of this type get a generic name+comment form; define them and you control exactly what gets captured.
Tap Save to commit your changes, or Cancel to bail. The red trash icon next to a type in the list deletes the type itself — existing features keep their data but lose the type definition.
Designing your own fields
The Attributes section is the real power of the Dictionary. Tap Attributes to expand it.
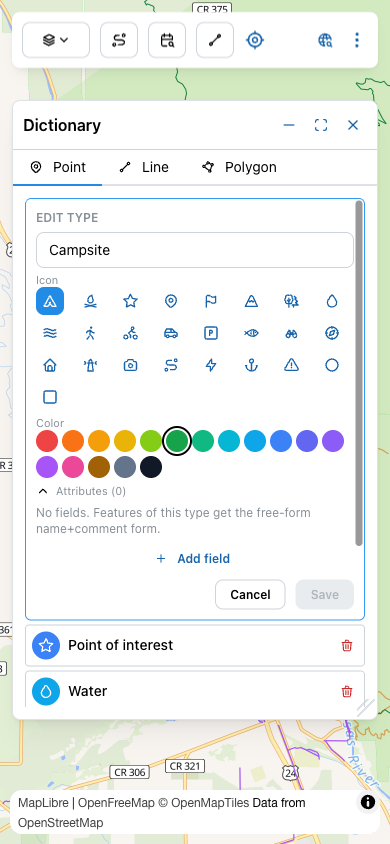
Tap + Add field to add a custom field.
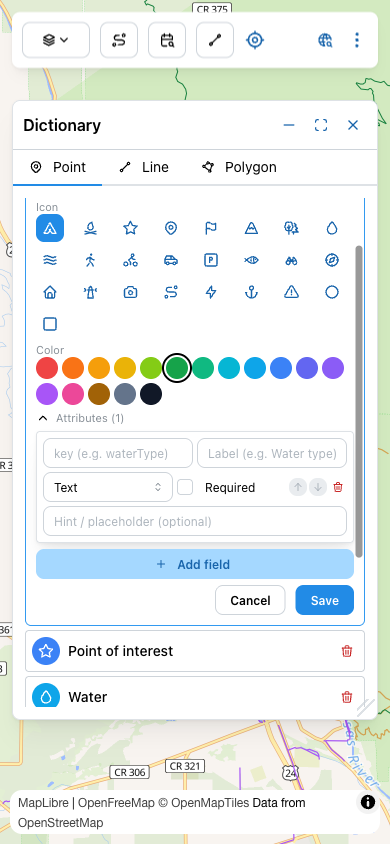
Each field has these knobs:
| Field | What it does |
|---|---|
| key | The internal name (e.g. waterType). Stored with the feature and used when you export. Use camelCase and no spaces. |
| Label | The human-readable name shown in the form (e.g. Water type). Edit freely. |
| Type | How the input renders — Text, Number, Boolean (a checkbox), or Select (dropdown). |
| Required | If checked, the user can't save the feature without filling this in. |
| Hint / placeholder | Optional gray helper text inside the input — handy for examples or units ("e.g. spring-fed", "GPM"). |
| ↑↓ reorder | Change the order fields appear in on the form. |
| Trash | Delete the field from this type. Doesn't affect existing features. |
For Select fields a "Options, comma-separated" input appears so you can list the allowed values.
src_t, even though src_t is what gets saved.
Creating a brand-new type
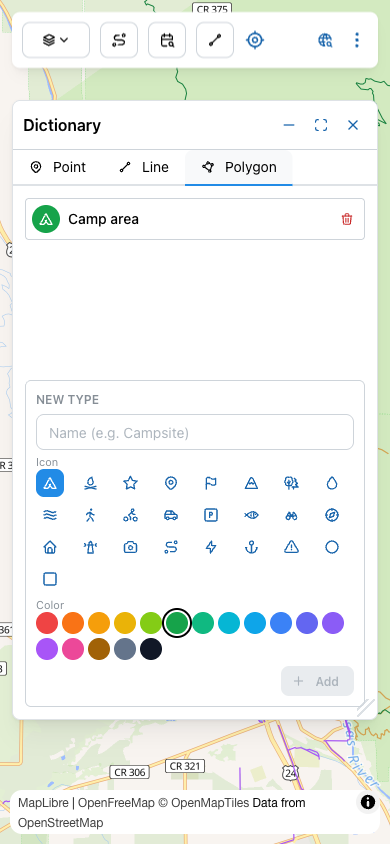
Below the list on any tab is the New type form — same fields as Edit, but blank.
- Give it a name.
- Pick an icon. The first row tends to be the most recognizable.
- Pick a color distinct from anything you already have, so it stands out on the map.
- (Optional) Expand Attributes and add your custom fields.
- Tap + Add to commit. The new type appears in the list and is immediately available in the drawing tools.
What about the Polygon tab?
Polygons work the same way — name, icon, color, attributes — but the starter list is smaller because the use cases are narrower.
Tips
Map tools→
Now that you've designed your types, the Map tools toggle in the More menu is what lets you actually drop them onto the map — point taps, line tracing, polygon drawing, and the Watch's one-tap capture.